Describe step by step on how to use optimizer app on Windows to boost performance and free storage space correctly. Don’t worry if you do not know which option to use which option reject when using this app. Below shows the perfect set of options to use safely on almost all Windows computers and laptops to have an optimized system.
First download and install the latest version of this application. Click here to download Optimizer for Windows now. Open recently installed optimizer app and follow below given steps correctly to optimize your computer.
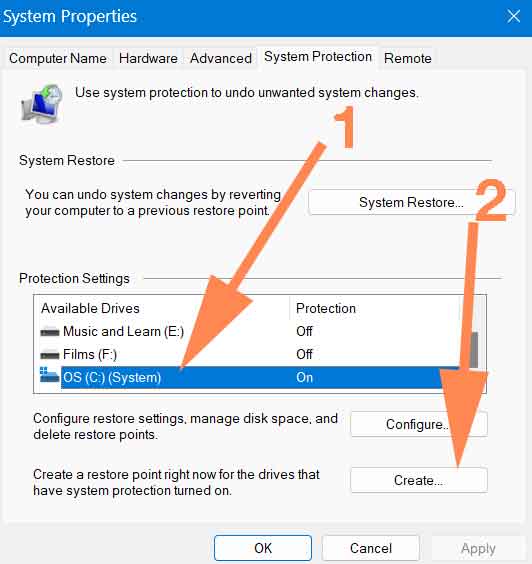
Create windows restore point
Why do we need a restore point? Everyone’s computer is not the same. Some Windows systems have different settings, applications, modifications, virus guards, and more. Running an optimizer app like this may break or lose important apps or files. You can’t tell what will happen. Sometimes you may choose the risky option that you want to revert. You can restore what you have done with the Optimizer or any other Windows optimizing apps out there. It is always better to have a backup plan.
– Press the “Windows” button on your keyboard or select the Windows icon from the taskbar.
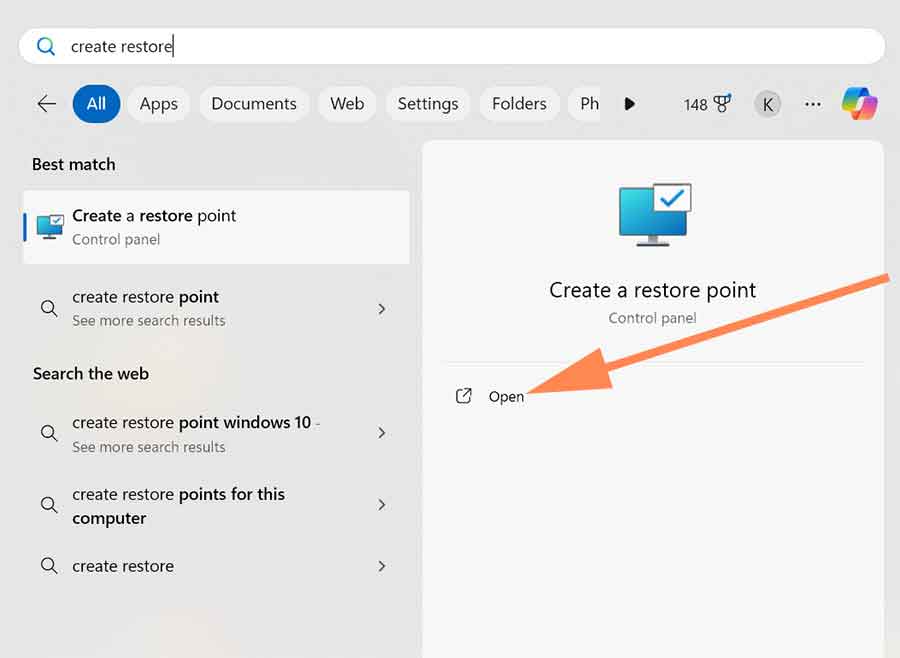
– Type “create restore point” on the search area.
– Select “Create a Restore point” settings in search results like below picture.
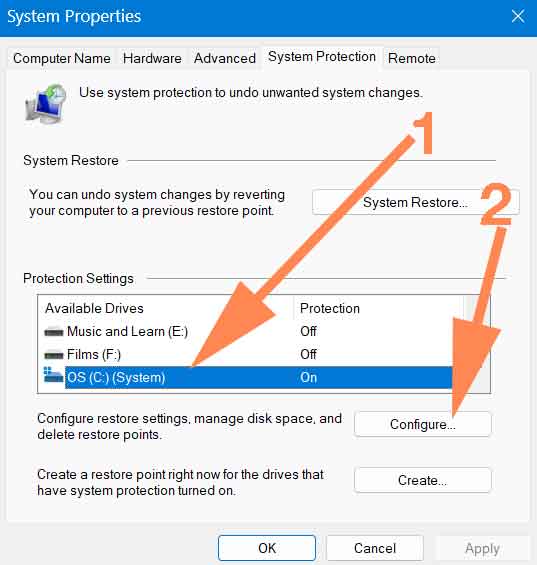
– Now select to highlight system drive or C: drive.
– Select the “Config” button.
– Make sure “Turn on system protection” feature is enabled. If not enable it.
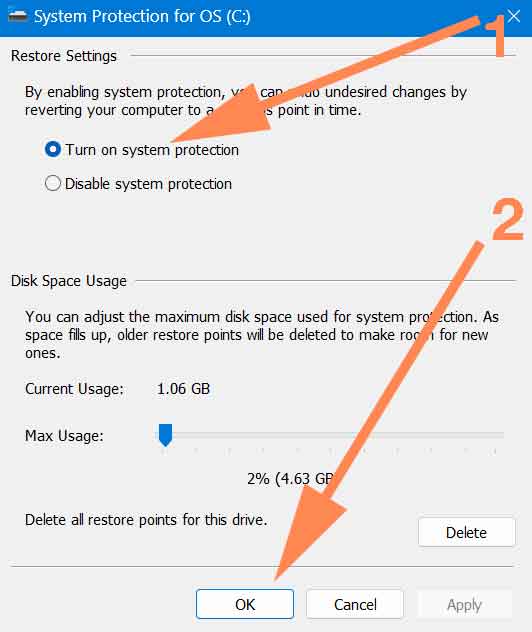
– Make sure system drive is still highlighted. Select the “Create” button.
– Give any preferred name for the restore point ex: “before optimizer”
– Now select “create” to begin creating a restore point.

Best settings for Optimizer App
Below are the best settings to apply when using this application. You can safely use below options when using this application to boost performance and free storage space. First open recently installed optimizer app. If not click here to download
General Settings
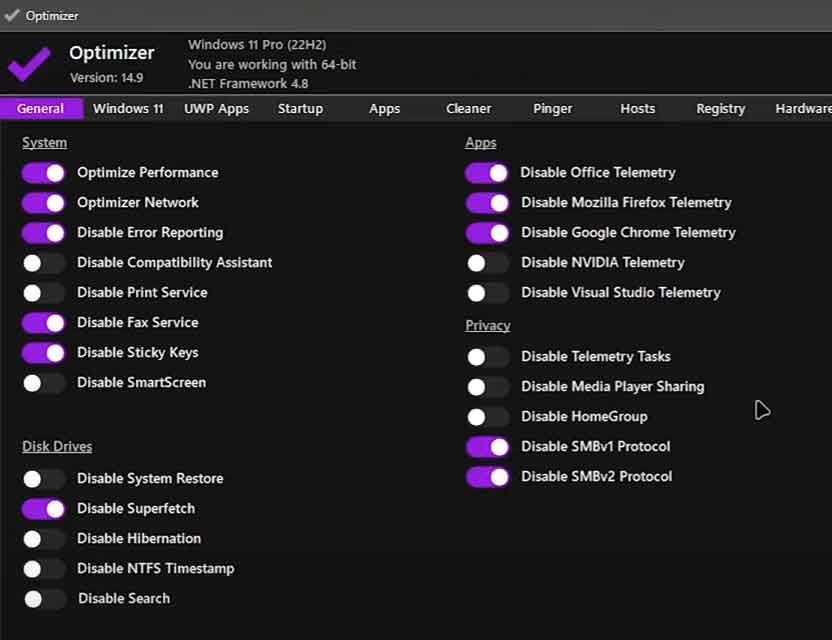
- System
- Optimize Performance
- Optimize Network
- Disable Error Reporting
- Disable Fax Service
- Disable Sticky Keys
- Apps
- Disable Office Telemetry
- Disable Mozilla Firefox Telemetry
- Disable Google Chrome Telemetry
- Privacy
- Disable SMBv1 Protocol
- Disable SMBv2 Protocol
- Disk Drives
- Disable SuperFetch
Windows 11 Section
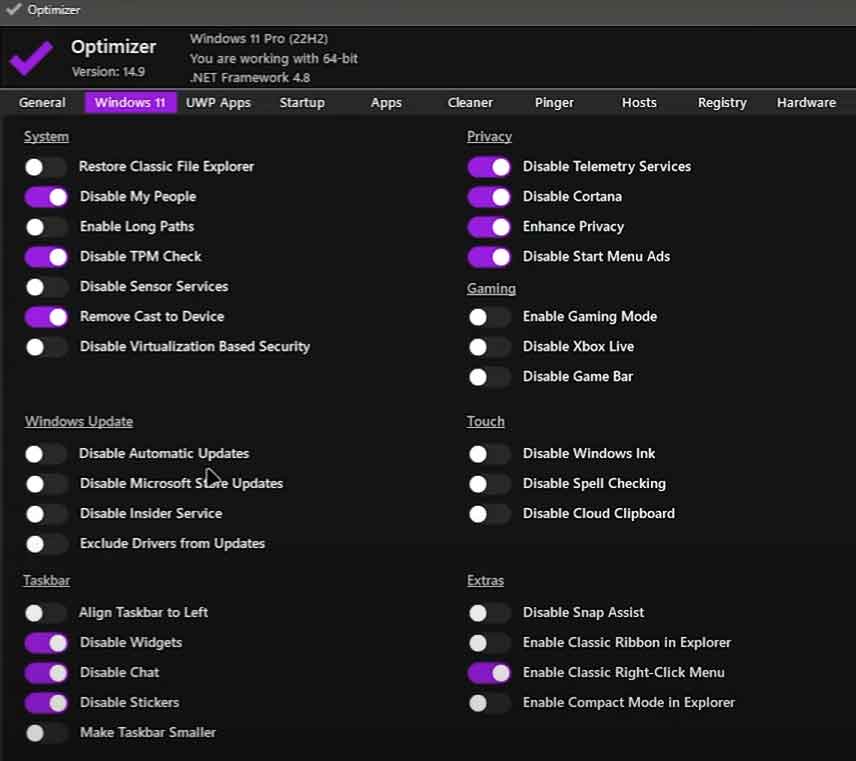
This settings page is only for Windows 11 users. Windows 7, 8, 8.1 and 10 users please ignore this page.
- System
- Disable My People
- Disable TPM Checks
- Remove Cast to Device
- Taskbar
- Disable Widgets
- Disable Chat
- Disable Stickers
- Privacy
- Disable Telemetry Services
- Disable Cortana
- Enhance Privacy
- Disable Start Menu ads
- Extras
- Enable Classic Right Click Menu (optional)
After completing the above 2 sections press the “Restart to apply changes” button at the top right corner to apply changes.
UWP Apps
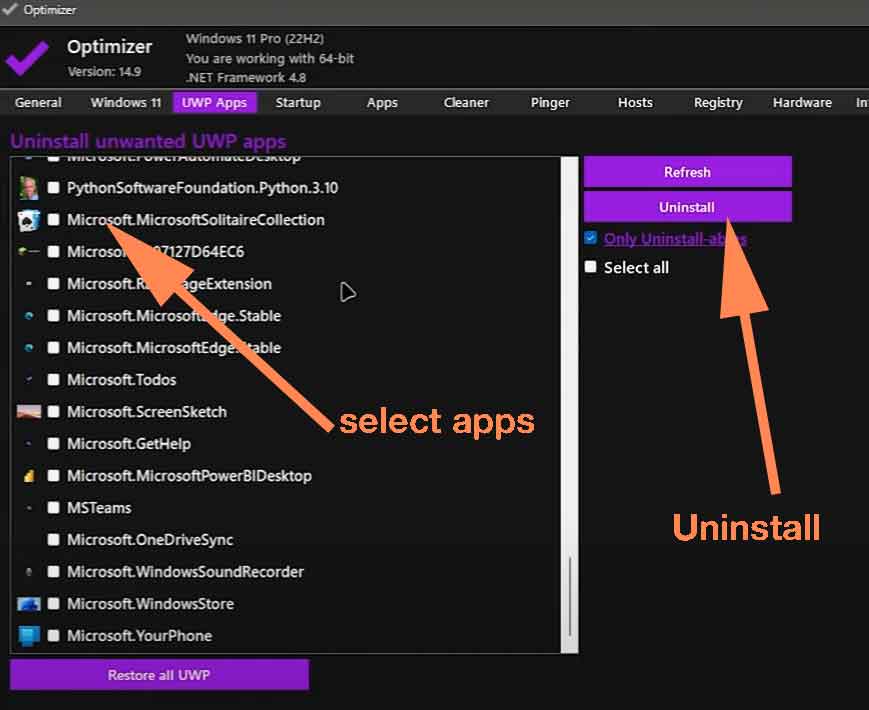
UWP or Universal Windows platform apps are applications that support all compatible Windows platforms like desktop PCs, Xbox, Mixed-reality headset, and so on. This app will list all available UWP apps on your computer. Select and uninstall unused apps from the list to free up storage space.
Startup Section
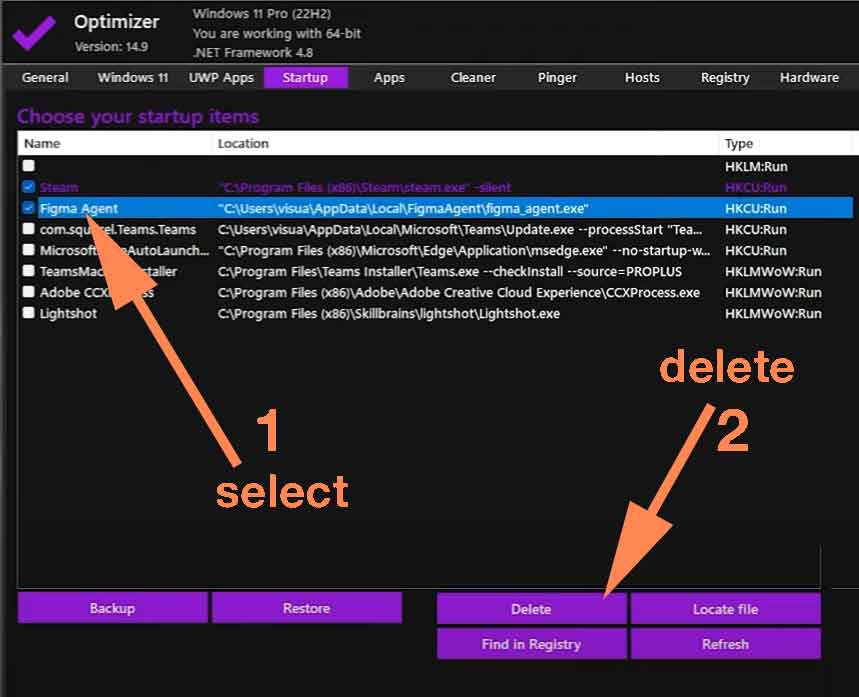
Startup apps are applications that start automatically every time on fresh start or restart your computer. Most large applications have startup services that need to be run in the background even without using the application. One of the main reasons to wait longer to use your Windows computer is startup apps. In the “Startup” section you will see the full list of startup apps. Select only the apps you know to stop starting when Windows begins. I cannot give any reference because it is based on the type of applications you installed.
- Select “Backup” button to backup your startup apps settings.
- Now select and remove less important apps from startup app section.
- Select delete.
It is hard to suggest which apps to remove. For example, Skype, Adobe Creative Cloud, and VPN services are some of the commonly available startup apps. If you do not use Skype and Adobe apps daily you can safely remove those from startup section. Select apps less important apps and press delete to stop AutoStart. If you mess up removing startup section use restore button to restore your startup apps to default state.
Cleaner Section
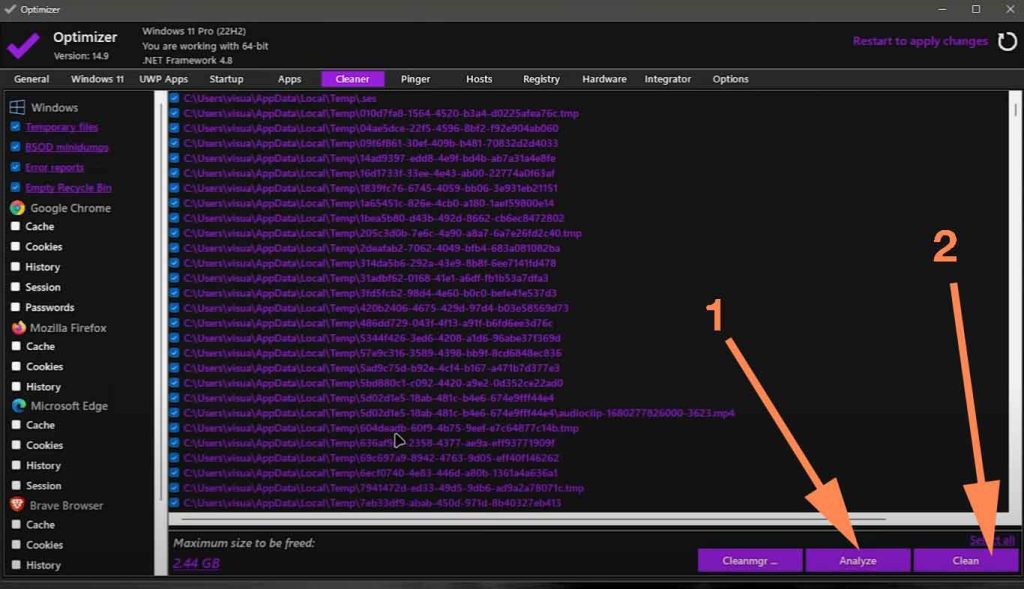
This section shows files that can be safely deleted from your computer to free storage space. The first option (Windows) shows files can be removed easily from Windows system.
- Windows
- Temporary files
- BSOD Minidumps
- Error Reports
- Empty Recycle Bin
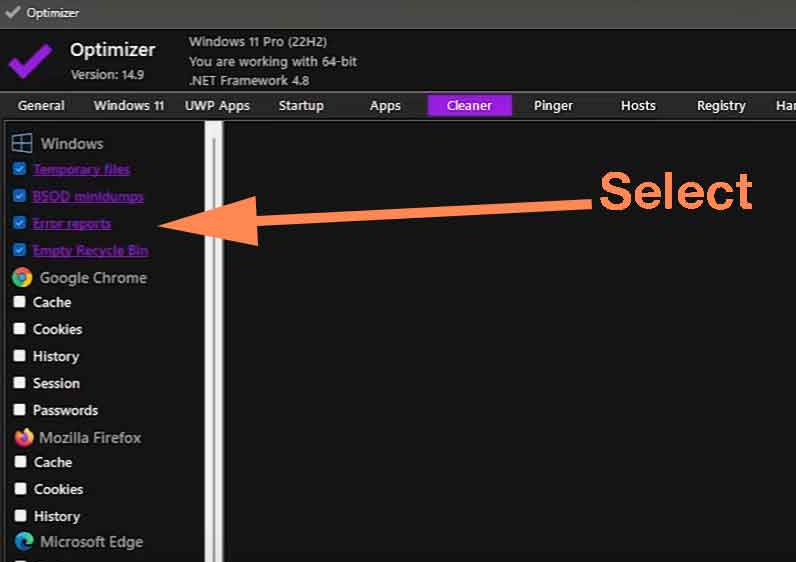
Below Windows cleaning section, you will see all installed web browsers with their removable files like
- Cache
- Cookies
- History
- Sessions
- Passwords
Carefully select only which files you need to remove from web browser.
Fix Common Registry issues
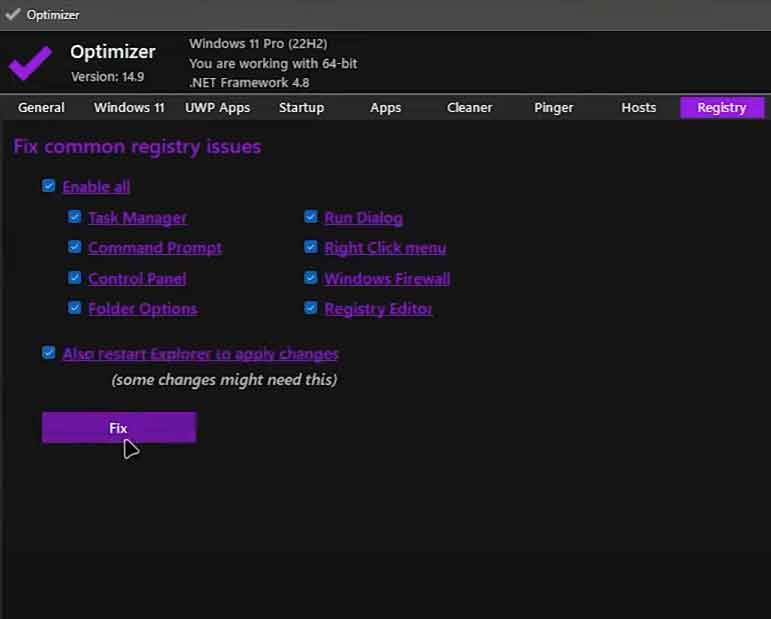
Why fix registry issues? Registry issues may cause slow system performance, application crashes, application errors, blue screen, startup problems, security vulnerabilities, and more. This application can fix common registry issues to fix most of those issues. Select “Enable all” and press “Fix” button to find and fix all the issues. Available options are
- Task Manager
- Command Prompt
- Control panel
- Folder options
- Run dialog
- Right-click menu
- Windows firewall
- Registry editor
Integrator section
Here you can add items to the desktop right-click menu. This feature is very handy if there is any recurring process and you want to run it with a few simple steps. You can add any program that needs to run as quickly as possible without searching and selecting the app, you can add
- Any program
- Shortcuts to folders
- Links to web
- Any type of file
- Commands
How to add items to desktop right-click menu
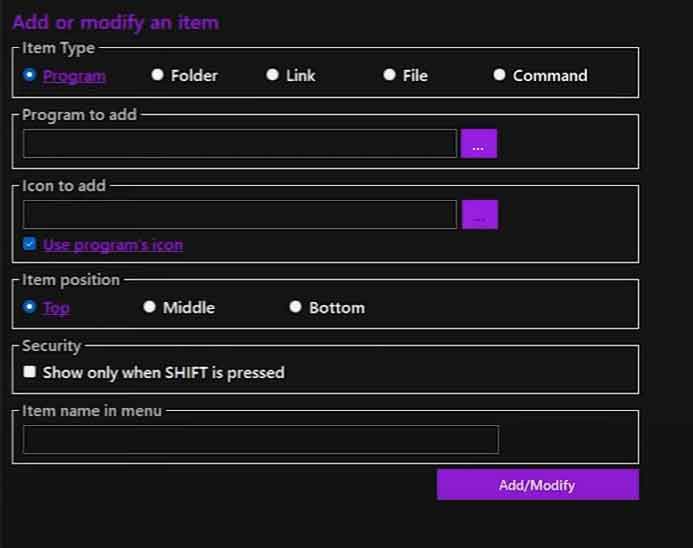
- Check bottom of the Optimizer application under the “Integrator” section. You will see options to “Add/Modify”. Select “Add/Modify”.
- Now select “Item type” from “Program”, “File”, “Folder”, “Link”, and “Command”.
- If you want to run a program choose program.
- Add an icon to display
- Select position of the item in the right-click menu
- Select the “Add/Modify” button to complete.
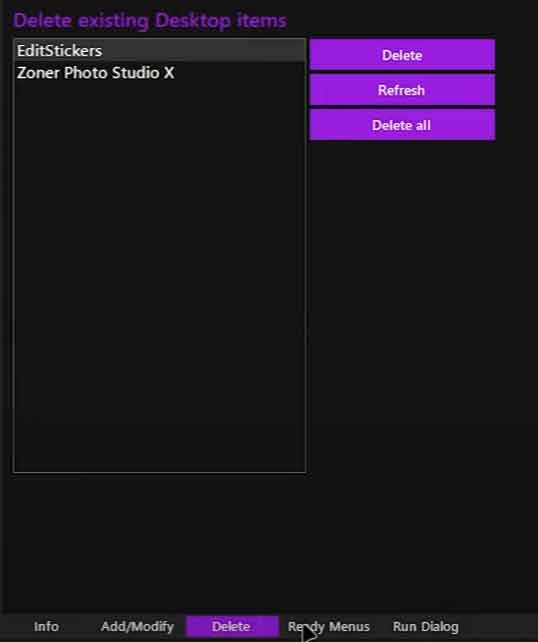
Apart from “add/modify” you will see “Delete”, “Ready Menus” and “Run Dialog”.
Delete – delete created menu items
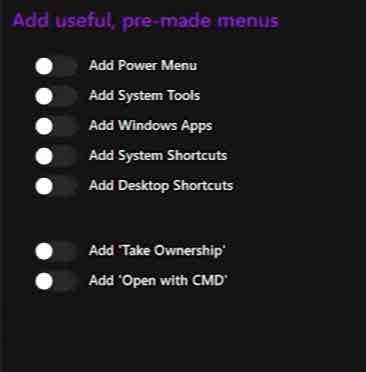
Ready menu – shows pre-made menus like “power menu”, “System Tools”, “Windows Apps”, “System Shortcuts”, “Take Ownership” commands, etc.
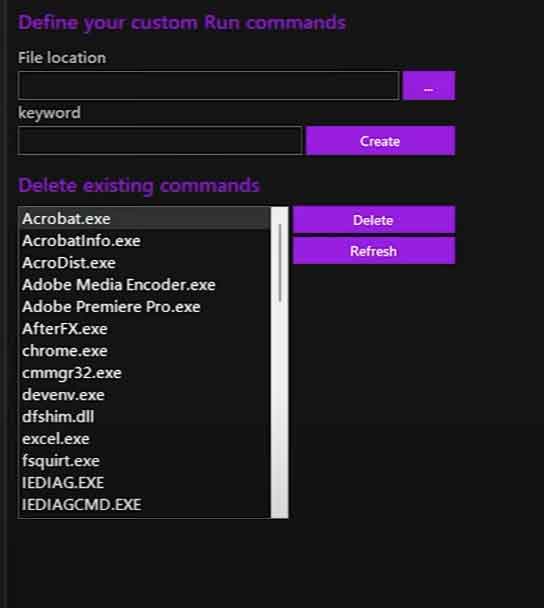
Run Dialog – Here you can define custom run commands.